Showing posts with label Recipes. Show all posts

Sep 20, 2013

Recipe - Simple Venison Backstraps and Roasted Vegetables


Well it's official, the freezer is empty of venison as I used the last of it last night for dinner. No need to panic though because nature's pantry is open for business.  Our Archery season opened last week and even though work and family has kept us out of the woods this week, we will be out tomorrow working at filling the freezer.


Simple Venison Backstrap and Roasted Vegetables


Normally I keep cooking venison simple and delicious.  We butcher our deer ourselves this allows us to clean it up the way we like and control the portion size.  I prefer to leave my backstraps in big portions which gives me many options for cooking them later on.  Easy enough to use as is, slice up for steaks or any other need.

Ingredients:

  • Venison Backstrap
  • Spices for venison - I use Salt, pepper, onion and garlic or Weber Steak seasoning 
  • Butter or oil for cooking 
  • Beef Stock - Just enough to deglaze the pan after cooking.
  • Vegetables of your choice - cut into bite size chunks
  • Spices for veggies - Your choice.  I use the standard salt, pepper, onion and garlic
  • Walden Farms Balsamic Vinaigrette

Cooking Instructions:

  • Cut vegetables into bite sized pieces and place in a bowl.  I used broccoli, peppers and mushrooms, but your favorite veggies will do.
  • Add at least two tablespoons of Walden Farms Balsamic Vinaigrette. Substitute your favorite dressing or oil and season with your favorite seasonings.  I use the standard salt, pepper, onion and garlic.
  • Spread vegetables out in a single layer on a baking sheet and place in a preheated 450 degree oven for about 20 minutes or until you achieve your desired tenderness.
  • Trim backstraps by removing all fat and silver skin and pat dry. Cut into large chunks that will fit in your pan.
  • Season both sides of backstraps with your favorite seasoning.  I used the standard salt, pepper, onion and garlic.
  • Heat frying pan with oil or butter.  I used a little bit of butter and olive oil.
  • Cook backstraps for about 5 to 7 minutes on each side depending on thickness and desired temperature - I prefer a medium rare for venison.
  • Remove from pan and let rest on a plate for 10-15 minutes.
  • Add some beef broth to the pan and de-glaze the pan scrapping up all the goodness - set aside for later
  • Slice the backstraps to your desired thickness and pour the pan drippings over them and serve.

There is usually a fight for the last piece of backstrap in our house and last nights fight was a little extreme due to it truly being the last piece in the house!

Share your favorite venison recipes!

Happy hunting and eating!


Sep 13, 2013

Asian Goose Stir Fry - Crockpot Style

With the Resident Goose season open and underway what better way to celebrate this season then with a new goose recipe so here it is - Asian Goose Stir Fry - Crock pot Style!


I had a two packages of goose breast (3 full breasts) left over from last season and decided it was time to use them up, but I wanted something different and something that would fit into my new lifestyle - fancy word for diet.  Originally I was thinking of some type of Goose Chili or Stew in the crockpot, but lately I've been making stir fry vegetables to spice things up on my diet and decided I had to do this with the goose.

Ingredients:
  • 2lbs of goose breast (skinless and boneless)  - cut into cubes or strips
  • 3/4 cup of teriyaki sauce (or soy sauce) for Marinade - my favorite is Soy Vay Veri Veri Teriyaki
  • 2 to 3 cups of water
  • 1 teaspoon Ground Ginger - I use the ginger in a tube as it is easier. Adjust to your taste
  • 1 teaspoon granulated garlic - I prefer to use fresh
  • 14oz bags of frozen stir fry veggies - I just grab the mix from the frozen section and I need lots of veggies with my new 'lifestyle' so I used two bags.

Cooking Instructions:
  • I let the goose breasts sit in a salt water bath over night, then rinse them good, dry them and then vacuum seal for the freezer.  Make sure to remove all the fat and silver skin prior to slicing.  I like to slice the goose breast into 1/4inch thin slices cut on an angle across the grain.  
  • Combine the sliced goose, sauce, ginger and garlic and seal in a plastic bag and let it sit in the fridge overnight.  I found that the longer I leave it - up to two days - really allows the marinade to soak in.
  • After letting it rest in the fridge, place the marinated goose breast in your slow cooker set to low and let it go for about 4 hours.
  • At the 4 hour mark add in the frozen vegetables and stir and continue cooking for another 2-4 hours or until the meat and veggies are tender.  Adjust times and temps based on your cooker and your needs.  Low and slow is my motto.
  • About 20-20 minutes before I'm ready to serve, I mix up about 2 to 3 tablespoons of cornstarch and 1/4 cup of  water in a bowl and stir it into the slow cooker. Depends on how thick you want it so start with a small amount and add more if you need it. Set your slow cooker to high at this point.  This will thicken up the sauce.

Serve over your favorite rice, or if you are like me and trying to be a little more healthy I will make a Cauliflower Rice instead or add some additional veggies to the plate and pour the goose on top.

You can always replace the goose with beef, chicken and probably even some pheasant or duck.

Give it a try and let me know how you liked it.

Happy Hunting!

Mar 22, 2012

My favorite Wild Turkey Recipes

With spring turkey season on deck I figured I would use this opportunity to share my favorite wild turkey recipes.


How to cook those legs and thighs:  I slow cook the legs and thighs in a slow cooker with some chicken broth and some seasonings and the real secret is low and slow.  I start them in the morning and cook them on low and they are done by the time I get home from work.  I don't want the meat to fall off the bone, but it's close to doing so.  Remove them from the crock pot and let them cool on a plate.  You can strain the liquid from the slow cooker and save for adding to the soup or use for another soup.  Once the turkey is cool place them in the fridge over night and then pick them apart cold.  It seems easier to separate the meat from all those pesky tendons after it is cold.  I've also picked them after letting them cool on the counter.  I then use this picked me in the recipe below.  If you are one of those folks that swear the turkey legs are no good, then give this cooking method a try and I'm sure you will change your mind.


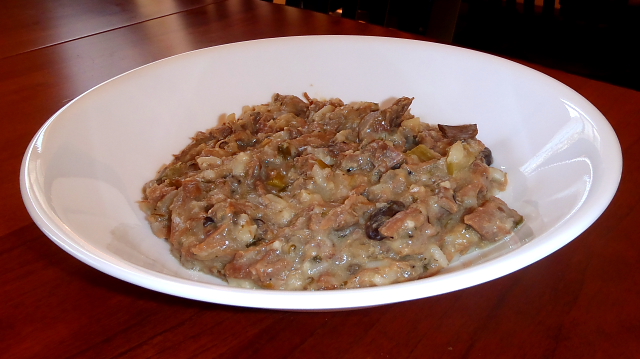
The first is Turkey, Mushroom and wild rice soup.  I found this recipe on a states fish and game website many years ago when I was looking for a way to use the turkey legs and thighs which is the same time I came across the cooking method above.  I can't remember which one either but some of you may have seen it.

Turkey, Mushroom and Wild Rice Soup
  • 3-4 cups of cooked turkey, cubed or pulled -I use turkey legs and thighs cooking method above.
  • 3 stalks celery, chopped
  • 2 pkgs of mushrooms sliced - what ever kind you like
  • 1 - 2 cups of cooked long grain wild rice
  • 1/2 cup of white wine
  • 2 cups of milk
  • garlic - as much as you like but at least 2cloves - crushed/minced
  • 1/2 cup chopped green onions
  • 1/2 teaspoon of thyme
  • 2 tablespoons parsley
  • 1/4 cup of parmesan cheese, I use shredded
  • 2 tablespoons butter
  • 2 tablespoons cornstarch
  • Water or stock (can use the stock from the crockpot here)
  • Salt and Pepper to taste
Cook the rice as directed.  In a large skillet, melt the butter and add the onion, celery, mushrooms and garlic and cook until tender.  Add Turkey, wine and salt and pepper and cook for a few minutes while stirring.  Add cornstarch to milk, mix and add to skillet.  Cook until bubbly.  add rice to pain and remaining seasonings and Parmesan cheese.  Add water or turkey/chicken stock to make everything a little soupy.  Simmer for another 20 minutes and serve.  Add some biscuits or some crusty bread and you have a warm hearty meal.

The next favorite is what we call Turkey Poppers.  There are many recipes out there that are the same, but with a different name and no matter what they are called, these are great tasting little treats that everyone enjoys and go a long way when introducing others to eating wild turkey.

Southwest Turkey Poppers
  • One Turkey breast - boneless
  • Thick sliced hickory smoked bacon- your favorite bacon will work
  • jalapeno peppers - sliced
  • Southwest salad dressing - substitute your favorite dressing or BBQ sauce.
  • Toothpicks
Cut the turkey breast into strips just wider than your bacon - about two inches and marinate overnight in southwest dressing (substitute your favorite dressing or BBQ sauce).   Prepare the jalapeno peppers by cutting in half and removing the seeds and slicing them into long pieces.  Take a marinated strip of turkey and lay it flat.  Place a slice of pepper on the center of the turkey strip and roll up.  Place a strip of bacon around the rollup and secure with a tooth pick.  Now you can cook these on the grill, my preferred method, or bake/broil in oven until turkey and bacon is cooked.  Take care to not over cook.  

If you have a favorite wild turkey recipe feel free to share it in the comments section.